
In the following, I describe how I set up Windows 10 as a virtual machine (virtual server) on my Proxmox host at Hetzner. The whole thing is based on Proxmox 5, but should work similarly with other versions. It should also be possible to install Windows Server versions in this way.
What is needed
In order to virtualise Windows via Proxmox, we need the following things
- A Proxmox Host
- A free IP
- A Windows 10 ISO
- Hard disks, network and virtual balloon drivers (all included in this ISO)
Step 1: Set up the virtual machine
We start by creating the virtual machine. To do this, we open the Proxmox web interface and click on "Create VM". In the next step, we select our Windows 10 ISO and continue with the selection of "Microsoft Windows 10/2016". The hard disk bus must be "VirtIO" and for performance reasons we select "Write back" for "Cache". We can select the main memory as desired. We must select "VirtIO (paravirtualized)" as the network card.
With this we can create the virtual machine.
Before we can continue, however, we have to include the driver ISO. To do this, we go to the hardware tab and add another drive and select the VirtIO image accordingly.
Step 2: The Windows installation
We can now start the virtual machine. So that we can see the monitor output of the VM, we click on "Console" -> "novnc".

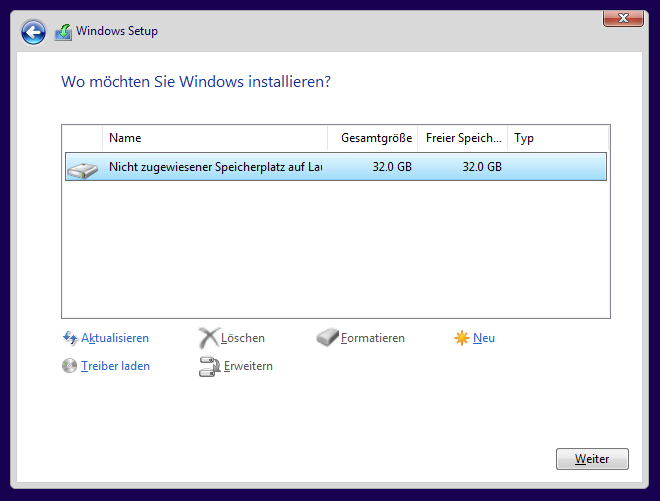
We click through the Windows installation until we reach the selection of the hard disk. This window will be empty at first, as Windows cannot find the hard disk without the driver.
To load the driver, click on "Load driver" and navigate to the CD drive where the VirtIO image is located. The required driver is located under "viostor\w10\amd64". After selecting the driver, the hard disk is displayed.
We can now proceed with the installation.
Step 3: Configure Windows
After Windows has been installed, we still have to install two drivers. To do this, open the CD drive with the VirtIO image in File Explorer. The network driver is in the folder "NetKVM\w10\amd64" and the virtual Balloon driver is in the folder "Balloon\w8.1\amd64". We install both drivers with a right click -> "Install".
Now only the network configuration is missing.
First, it must be ensured that the desired free IP is routed via the Proxmox host. This is mandatory with Hetzner. To do this, we create a route in the host
up ip route add 5.9.xxx.xxx/32 dev vmbr1
down ip route del 5.9.xxx.xxx/32 dev vmbr1
This procedure is necessary analogous to all other virtual machines and containers on a Proxmox host at Hetzner and is therefore not Windows-specific. Instead of forwarding the IP individually as in the excerpt above, an entire subnet can also be forwarded. If you have questions about this, it is best to read the Hetzner Wiki.
Let's move on to the actual network setup.
We open the network configuration in Windows and enter the free IP there. The subnet mask is 255.255.255.255 and the gateway is the IP of the Proxmox host. We can freely choose the name server. This could be the DNS from Google (8.8.8.8) or one from the OpenDNS project (208.67.222.222).
Now Windows should have a network connection to the Internet.
This completes the set-up.

Leave a comment now