
Anyone who wants to access their Synology from the Internet and has a normal Internet connection knows the problem: The IP of the Internet connection changes regularly. In order to still be able to access the Synology, DSM offers a function called "DDNS". This makes it possible to use various DynDNS providers. Unfortunately, Cloudflare is not included. However, Cloudflare can be used easily and free of charge, which is why I explain here how to retrofit Cloudflare as a DDNS provider in the Synology DSM.
My solution is based on the open source project SynologyDDNSCloudflareMultidomain and in the following I explain the short installation:
Activate SSH access
First we need to enable SSH access on the Synology. This is necessary because in order to add Cloudflare as an additional provider, changes must be made via SSH. To do this, we open the control panel and select "Terminal & SNMP". There, the SSH service must be activated under "Terminal".
To establish an SSH connection to Synology from a Windows PC, we need nothing more than the Powershell. We open it and enter the following:
ssh admin@192.168.14.1Instead of "admin", enter your Synology administrator user name and instead of the IP "192.168.14.1", enter the local IP of your Synology.
If the login was successful, you will see the command line:

Now we download the script that we need for Cloudflare as another DDNS provider:
sudo wget https://raw.githubusercontent.com/mrikirill/SynologyDDNSCloudflareMultidomain/master/cloudflare.php -O /usr/syno/bin/ddns/cloudflare.php && sudo chmod 755 /usr/syno/bin/ddns/cloudflare.phpNow we need to make the new provider known to Synology by adding the following to the file "/etc.defaults/ddns_provider.conf":
[Cloudflare]
  modulepath=/usr/syno/bin/ddns/cloudflare.php
  queryurl=https://www.cloudflare.com/
This completes the setting via SSH. The SSH window can be closed and the SSH service deactivated.
Configure the new Cloudflare provider
Now the new provider only needs to be configured. To do this, we go to Control Panel in the Synology DSM again, but this time to "External Access" and click on "Create". Cloudflare now appears in the list of providers:
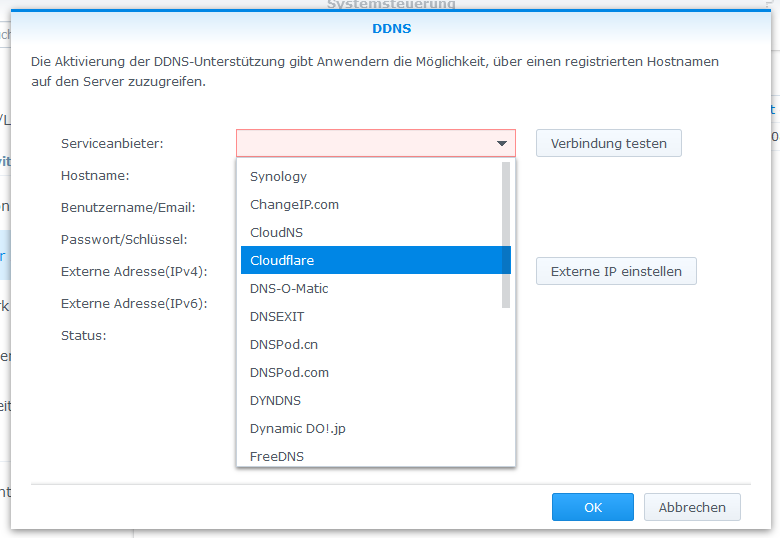
As host name, we select the domain under which we want to reach our Synology. The domain must already be configured in the Cloudflare interface.
The username is the email address we use to log in to Cloudflare.
As a password we need the Global API Key, which can be displayed here.
We confirm the setting with "OK" and this completes the setup.
Leave a comment now