The TV can also be controlled very easily with Amazon Echo or the Echo Dot. The prerequisite is a VU+ receiver with VTI image and a Raspberry Pi.
On the Raspberry Pi we install ha-bridge, an open source solution that simulates Hue lamps. Alexa recognises these and can control them. If we name one of the simulated Hue lamps "RTL", for example, we can switch to RTL with the command "Alexa, switch on RTL".
The instructions are divided into 3 parts:
- Install ha-bridge on a Raspberry Pi
- Connecting ha-bridge with Vu+ Receiver
- Connect Alexa
- Overview VU+ commands
The whole thing is ready to go in less than 30 minutes.
1. Install ha-bridge on a Raspberry Pi
habridge is a Java software, so we need to make sure that Java is installed on our Pi. This can be done with
sudo apt-get update && sudo apt-get install oracle-java8-jdk
Now we create a new subfolder in our home directory and download it
cd /home/pi/
mkdir habridge
cd habridge
wget https://github.com/bwssytems/ha-bridge/releases/download/v4.1.2/ha-bridge-4.1.2.jar
Next, we create a start file for habridge. In this file we also specify the port on which the web interface should be accessible. I had to change this port because the default port 8080 was already used on my Raspberry Pi:
vi starthabridge.sh
And enter:
cd /home/pi/habridge
rm /home/pi/habridge/habridge-log.txt
nohup java -jar -Dserver.port=8080 /home/pi/habridge/ha-bridge-4.1.2.jar > /home/pi/habridge/habridge-log.txt 2>&1 & chmod 777 /home/pi/habridge/habridge-log.txt
Then we make the start script executable
chmod u+x starthabridge.sh
And start habridge
./starthabridge.sh
Now we check the log file for errors
tail -f habridge-log.txt
If no errors occurred, habridge is now installed and accessible via the port configured above in the web browser.
2. Connect the ha-bridge to the Vu+ receiver.
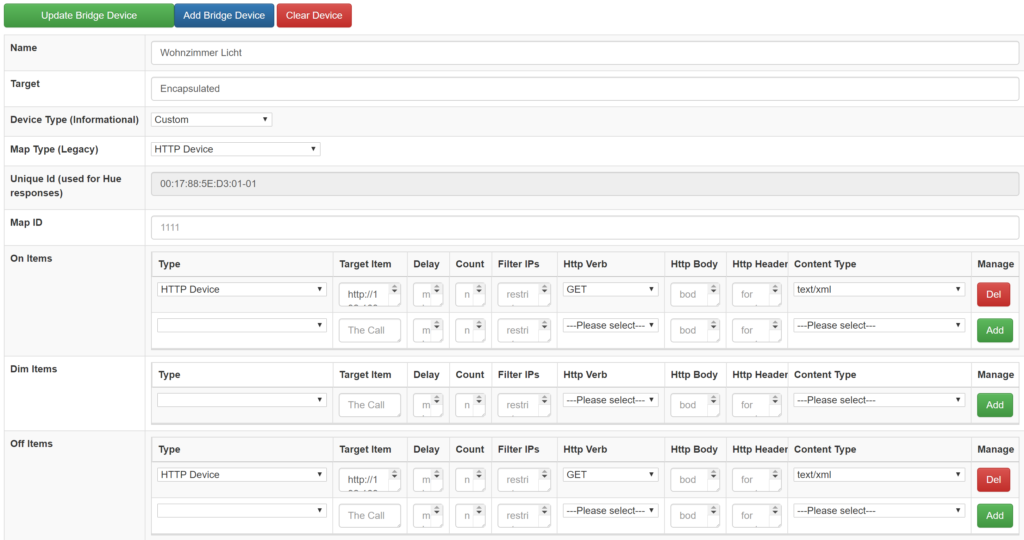
We now call up the web interface. On the start page we see all the devices that Alexa would recognise as Hue lamps. Of course, none of them have been created yet, but we can change this by clicking on "manual add".
We only need a few fields for the installation:
- Name (Alexa will recognise the device under this name, the name "TV" will therefore lead to the following voice command "Alexa, switch on TV")
- Device Type "Custom
- Map Type "HTTP Device
- On Items -> Target Item
- http://[IP]/api/remotecontrol?command=113&callback=jQuery
Command 113 stands for the power button. Other commands can be found further down in this text.
To switch to a specific channel, use the following url:
http://[IP]web/zap?sRef=1:0:19:EF10:421:1:C00000:0:0:0
The bold letters here stand for the corresponding channel ID. This can be found in the channel list which is stored as a user bouquet on the VU+.
3. connect Alexa
We go to the Alexa app, then to Smart Home and scroll all the way down. There we let Alexa search for new devices. This takes a short time and then the setup is complete. The Vu+ can now be controlled remotely.
4. overview VU+ commands
116 Key "Power
2 Key "1
3 Key "2
4 Key "3
5 Key "4
6 Key "5
7 Key "6
8 Key "7
9 Key "8
10 Key "1
11 Key "0
412 Key "previous
407 Key "next
115 Key "volume up
113 Key "mute
402 Key "bouquet up
114 Key "volume down
174 Key "lame
403 Key "bouquet down
358 Key "info
103 Key "up
139 Key "menu
105 Key "left
352 Key "OK
106 Key "right
392 Key "audio
108 Key "down
393 Key "video
398 Key "red
399 Key "green
400 Key "yellow
401 Key "blue
377 Key "tv
385 Key "radio
388 Key "text
138 Key "help


Hello,
"Command 113 stands for the power button" should surely be 116 😉
Hello,
I'll make the first comment. It's very exciting to read. I look forward to the next steps.
My experience is that questions in blog articles help. As soon as the reader simply feels addressed, a larger number of comments come in.